20150221

SGT Run Ranger Run 2015 I.B. work in progress day 3

Good morning folks,

Yesterday went so smooth that we were able to really get some of the very critical tasked out of the way. Of course I will explain those in a bit more detail later.


Below we started the rough grinding. You start we a very coarse 2"x72" 60 grit belt, you do all your rough work and grind to the parallel we spoke of in the earlier post. The key is to get both sides as even as possible. If one side is different then the other it could cause the blade to warp in heat treat.


Constantly checking and measuring ensures that you get as close to perfect as possible. As you can see in this picture the the contact (Grinding wheel) is very small. I have contact wheels from 2" to 14" the larger the wheel the flatter the hollow grind will be. In this case I choose a 6" wheel which will produce a very deep hollow grind.  


Having some fun and grinding the blade with my eyes closed, please don't try this at home.....ha ha


All the holes are polished with scraps of belts, so they have a nice smooth finish.


After taking measurements and satisfied that things look good and ready for heat treat. We decided to do just that since we had time to get it done. I like to finish my grinding after heat treat as the steel responds much better, its much harder and the grinds are nice and crisp.

Before heat treat we decided to take nice group shot of bad ass things

The Heat Treat Station


 The knives are completely cleaned of any residue, then placed in the kiln edge up. Close the door, turn it on and it heats up to 1500 degrees. The first cycle is called "Normalizing" what happens is the knives are heated to 1500 degrees but they do not get quench in oil, they are removed and allowed to cool. What happens is it refines the grains in the steel you can do this several times before you do the final hardening quench. So in a nutshell it produces a better grain structure and stronger knife.

I opened the door for a quick view of the "Heat Miser" at work.


The blades removed from the normalizing stage and allowed to cool, this also gives you a chance to check and ensure they are straight and straight they are.

Back in the oven edge up, back up to 1500 degrees for 8 minutes. With fire proof gloves and metal tongs the first blade is grabbed at 6 minutes and plunged into the quench oil. The quench oil takes the blades from 1500 degrees down to 800 to 900 degrees in about a minute, in two minutes you can handle them with your bare hands.

At this point you have a very small window to check for any warping that may occurred, in the picture abouve you see a press I carefully use that to make minor corrections. To much pressure and the blade with snap......and yes I have snapped a few and it really sucks. 


 The blades after the quench, they have a soul, they are hard and ready to tempered.

The blades at this point are very hard....brittle would be a good term. If left in this state they would break under hard use or even dropped on the floor. So they go through whats called a "Temper cycle. Which consist of 400 degrees for one hour two times.


 I check them with whats called a "Rockwell Tester" very expensive devise but it's worth every penny. The rockwell tester has a diamond that penetrates the steel via a dial it tells you how hard the steel is. In this case it read Hardness Rockwell "C" scale or HRc 58-59


Stay tuned for more action
SAR


20150220

SGT Run Ranger Run 2015 I.B. work in progress day 2

Run Ranger Run Folks,

Day 1 was a complete success, I am really digging how this "Basterd" is coming along.

I will do my best to explain each processes shown in picture, should you have any questions please feel free to asked on the Facebook page, here, or my email sarglobaltool@gmail.com.

Please excuse the first photo its a bit out of focus. The master pattern is clamped to the steel. Then all the holes are marked and outline scribed for drilling and cutting .


Next we drill all the holes, I use a 15/64" drill bit and then I use a precesion reamer to ensure the hole is exactly .250 or 1/4"


I just liked this shot as you watch the chips extract.

 
Also to keep the drill bit cool and to prevent whats called work hardening, I use cutting fluid.


Both blades are drilled, counter bored and the top Basterd is ready to get cut on the band saw.


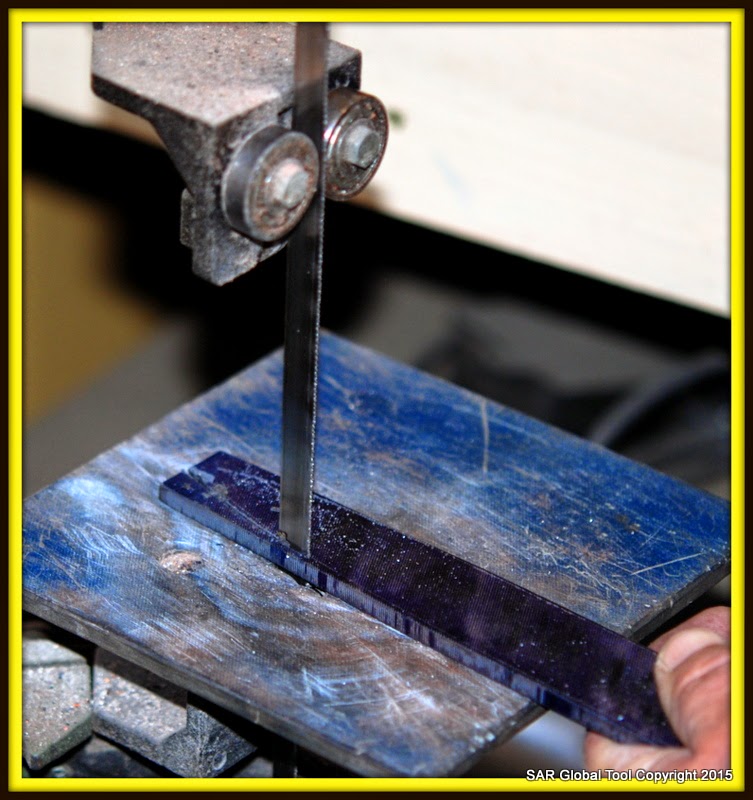
Cutting the profile,in reality it's pure monkey work and quite boring....ha ha


 On a 2"x72 horizontal grinder which has various size wheels we grind away all that cannot be cut with the band saw.....we call it "Profiling" and hey sparks are cool:)


Next phase is to measure the thickness of the steel, do a little math so we can find the center to mark a set of parallel lines. Those lines are my reference that I will use in the grinding the main bevels. The slab of granite which weighs approximately 350 pounds is pretty much 99.9% flat. The device that scribes the lines is called a Height gauge. So it goes like this with a micrometer I measure the thickness of the blade. Lets say its .0250" I then divide that number by 2 which gives me .0125", then I subtract 15 which gives me .0110. I set the height gauge to .0110, and dragged the edge of the point, which produces my grind lines.


As you can see I have nice reference lines which will ensure I keep my grind lines even and centered

Using a special rest I will grind at about 45 degrees to those reference lines


On my small mill I will machine groves for grip, or better yet a place for your thumb to rest for good retention and traction.

 I worked late and the light was not that great but you can see the progress made in one day. So we are tracking and on schedule.

Today I will concentrate on the other blade and bring it to the same level as the other. Then tomorrow we will be ready to heat treat and put the "Soul" into the blades. We plan to shoot video as it is pretty cool to see red hot steel come out of the oven.

Thanks and stay tuned for more action.
RLTW!
SAR


20150219

Run Ranger Run 2015 I.B. work in progress Day 1.

Run Ranger Run 2015,

 I just returned from a a trip down to Patagonia and had to delay the building of the 2015 Inglorious Basterd. I had a great time the place is a must see if you can ever find the time. This was my horrible view every morning....ha ha.


Okay now its time to get down to Basterd building. Last years Basterd was only 12" long, this years Basterd will be a whopping 14" of pure badness. So lets get this work in progress on the on the go.

As Always Rangers must have a contingency plan, as you can see from the following photo that our good friend Murphy showed up. Of the two blades started last year one broke, so of course we have
 two blades started again.


Please check in daily for progress, if you wish you can subscribe by clicking the "RSS" feed and every time I make a update you will get a email.

Its a great honor to help GallantFew Inc, Run Ranger Run and a pleasure to work with Karl, Cory, and Candyss.

If you need the back story on this epic event go to this link and have a read. Run Ranger Run


RLTW!

SAR

20140818

Airborne All The Way Forever!


Hey folks,


Last year around this time I decided to book a tandem jump, good thing is I picked the right company. Bill is the owner of skydive louisiana really solid company with a great staff and good if not great instructors. Bill has thousands of jumps under his belt and he does not or will not short change you.

Here is a link to last years tandem and my experience Dream become reality, that first tandem at 10,000 feet was breathtaking and talk about getting a really nice kick of endorphins. I have completed my last tandem and now qualify to go through AFF Accelerated Free Fall course to become licensed.

How did this jump come about well we have a had a good close friend of Scotts visting us from Australia for the last three weeks, Brent Tasca is a former 3RAR Para veteran last wedsday I asked if he would like to go skydiving and of course the answer was "Of course Mate" Also the day prior was US National Airborne day....we also gave ourselves "Mohawks" ha ha to honor those bad asses that jumped into Normandy on D-day.

We both have had many jumps from different types of aircraft bot fixed and rotary wing. But its very structured the point of military airborne operations is to get you to the ground as fast as possible so you can engage the enemy. You have all this fricken gear strapped to your body and it can be a long day of pain. The civilian side is very nice and painless if you follow instructions.


So we made the 3.5 hour drive up and after a fifteen minute brief Brent was walking out with Bill to make his jump. Brent choose to do a flip out of the aircraft.....ha ha


The aircraft is a Cessna 182, and the pilot is a young kid with 750 hours of flying and despite the high winds he provided a smooth flight up to altitude...once again good guys.


Brent coming in from his jump.


Nice and smooth


Stand up landing with nice flare


My jump was a bit different as I had to perform some task to ensure I was ready to start AFF and ready to jump on my own. Bill briefed me and while Brent was off doing his jump I rehearsed on the ground to ensure I performed to the best of my ability. When the door opens and its time to go years of mindset and training take over....confidence in yourself your equipment and your instructor. You really get focused on the task at hand and nothing else enters your mind.....but I was at peace when we exited.

Coming in once the canopy is open this is where the real skill is at..."Landing Safely" Bill was awesome and talked me the whole way in....like I said he knows I am coming back and is prepping me for the next time I go it alone. These rigs run very fast, highly maneuverable and if done the wrong way can spell a bad day. 


Walking of the DZ and still learning.....loving the Mohawk:)


Last shot is Brent Tasca, myself and Scott Chamberlain, we jumped with our Beret's in our pocket.

Airborne brothers to the end.........Death from above!


We also spoke with Bill and Scott is cleared to jump so we will get the "Squid" in the air".......I will be singing "Anchors away".......ha ha


Last thing is thanks to Bill and Skydive Louisiana for a great day look forward to the next few weeks

Thanks
AATW!
RLTW!
SAR


20140726

Whats availble at the store and in the chute!

Folks,

Hope your summer is going well, if ou are hitting the woods consider buying some SAR Eclipse Signal Systems of maybe a moon glow micro.

On the edged Tool side of the house we have a few OddJobs that  are in stock till they last.bThey have been a great selling knife with many happy customers.

Been working on four Hornet Recurves and a completely one off Hornet XL great selection of high end handle material, Iron wood, G10, red liners and Carbon fiber. So they are gonning to be nice.

The Hornet XL is In a bowie blade style...grey g10, red liners and lighting strike CF. It sould be pretty hot.

So please check www.sarglobaltool.com we re flush with the SAR Pocket comb and Ace pocket comb, plus all signal devices are always in stock.

SAR Global Tool OddJob can be found at http://sarglobaltool.com/


 Hornet Recurves in progress just before rough grinding the handles in for first fit.

 Handles shaped to blades from left to right grey G10, red liners and fine textured carbon fiber, next is some awesome desert iron wood, the tanto styleRanger green, Red liner and fine textured CF. The one off Hornet XL bowie has grey g10, red liners and Lighting Strike carbon Fiber should look really good. The Hatchet is for a good friend is sporting textured Ranger green g10
 Finished ODDJob's with reflective with reflective imsert
Thanks
Spencer Alan Reiter
SAR Global Tool

Any questions please email me at sarglobaltool @gmail.co

20140307

Going the extra Mile!

Folks,

I had a good friend and fellow Veteran build a box for the Run Ranger Run knife. It came out pretty nice. This morning my good friend Jason Ebeyer came over with his camera equipment and took really great shots of the whole kit.

I cannot share those photos as we hope to get a article published on the event and knife with one of the knife magazines.

The box is made from wood I reclaimed from a old garage I tore down this last summer, it is virgin pine from the early 1900's. It has been rubbed down with boiled linseed oil, really did come out nice and completes the package.

Wood burner in action the box says "28 RRR 565" Then stenciled SAR, and I.B.2014

Anyways thanks to Lyle Peters and Jason Ebeyer for your help.


20140301

Incredible support

Folks,

I talked with Cory Smith from Run Ranger Run and he gave me the tally. They promoted the knife from the beginning and took $50.00 dollars per person to enter for the drawing. The grand total was pretty awesome, all said and done the Run Ranger Run knife raised $22,061.00 dollars.

Unreal and you can bet we will do it again next year! I love my job!

RLTW!
SAR